Avoid the mistake that 30% of all customers make. They fail to purchase a mount and then order a mount at a later time, thus paying more for the mount and twice for shipping. Please consider your mounting strategy before purchasing.
The UltraGauge EM Plus and MX are offered with several mounting options each of which is described below. Each mount may also be purchased separately.
| Five Mounting Options | |
|---|---|
| Bracket | Primarily used for attaching UltraGauge to one of the mounts. Can be mounted in vehicle alone |
| Velcro | Simple, low cost, effective |
| Combo Mount | Compact, flexible |
| Windshield Mount | The easily molded neck provides for flexibility in UltraGauge placement |
| Compact Windshield Mount | Compact and fully articulated |
Bracket
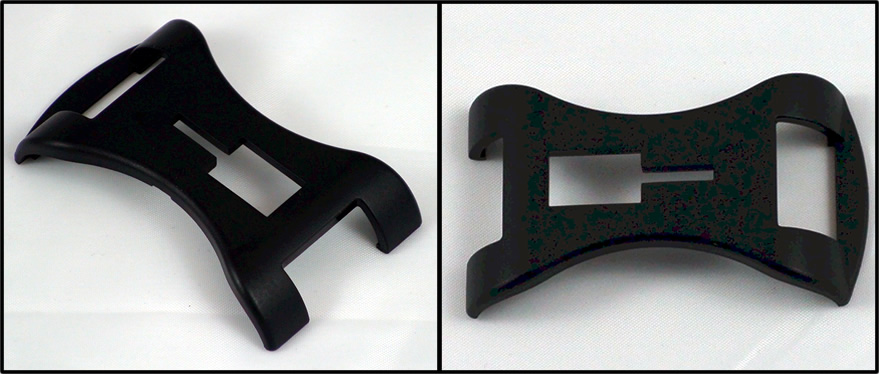
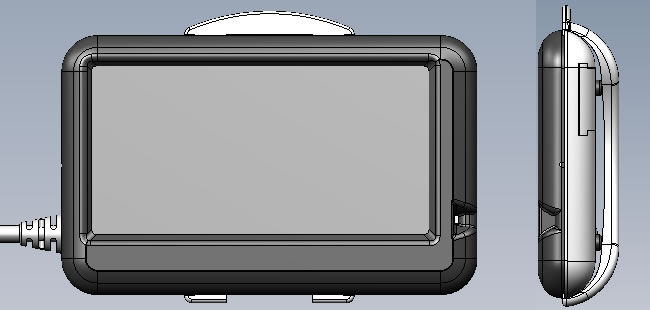
For all options except "Velcro Mount, No Bracket", the bracket is provided at no charge and comes installed onto UltraGauge, as shown above. The bracket allows UltraGauge to be attached to the mounts below. The bracket slides on to the "T" slot of the mount head and then UltraGauge "snaps" on to the bracket. The bracket can also be used for custom mounts or with the Velcro mount. For example, the bracket can be attached with adhesive, Velcro or a hard fastener, such as a screw, to a surface.
The Mounting Bracket may optionally purchased separately
Warning: The UltraGauge Bracket is not designed to fully slide on the the "T" slot of the mount. Only slide the bracket on to the "T" enough to hold it securely in place. Attempting to fully insert the Bracket onto the "T" slot will result in damage to the bracket.
Hook & Loop(Industrial Velcro)
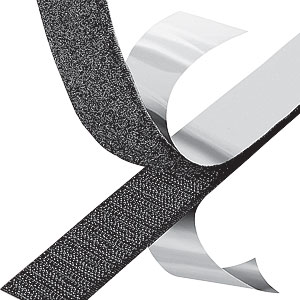
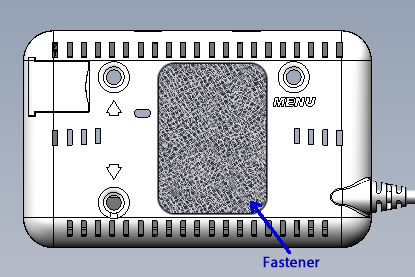
The hook and loop fastener, commonly known as Velcro™, is comprised of two halves, each is 3/4"x1.5". One half is attached to the back of UltraGauge, as shown above. The 2nd half is attached to a surface inside the vehicle, such as the dash face. Note that no Bracket is necessary when using the Velcro and the Velcro is optionally offered with or without a Bracket. The Velcro may be used as-is or trimmed in size or cut in to several pieces. Each half has an adhesive that can be applied to any clean, solid surface. The fastener is an industrial strength Hook & Loop which can withstand temperatures as high as 225F (107C) without lifting or shearing from the attached surface.
| Width | 3/4" |
| Length | ~1.5" |
Thickness mated |
0.15" |
| Color | Black |
| Temperature range | -20F - 225F |
Installation Instructions:
- It is advisable to slightly radius or round the corners with a scissors, as shown above. This will reduce the likelihood of lifting
- The surface to which the fastener is attached must be clean, dry, and oil and grease free. Clean the surface, even if it appears clean.
- Apply only when the temperature is 70F to 90F.
- Avoid leaving the adhesive exposed for longer than 3 minutes after removing the protective backing.
- The adhesive is pressure sensitive. Apply roughly 5lbs of force per square inch for 5 seconds.
- After application, and for maximum adhesion, allow the adhesive to set for 1 hour before use.
WARNING: Improper application of the Hook & Loop fastener may cause adhesive failure and result in damage to UltraGauge. Impact damage is not covered by the warranty. Once the backing has been removed, the hook & loop fastener can not be returned for a refund
The Hook & Loop fastener may optionally be purchased separately
Vertical & Horizontal Combo Surface Mount
This Combo mount is the same as the Vertical and Horizontal mounts detailed below, except that the Combo mount can be either the Vertical or Horizontal mount. This Combo mount is the Horizontal mount, with the addition of the Vertical mount head. If the Horizontal mount is the desired mount, then the Combo mount can be used as-is. If the Vertical mount is desired, then the Horizontal head assembly is removed from the base and the Vertical mount head assembly is inserted in its place. There is no longer a need to choose between Horizontal and Vertical mounts when purchasing. Please see the Horizontal and Vertical mount details and installation instructions below.
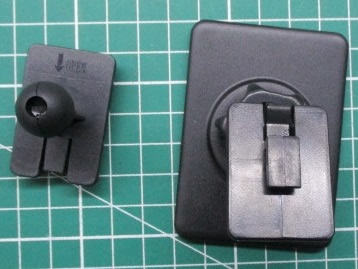
Horizontal mount and base on the right, vertical head on the left |
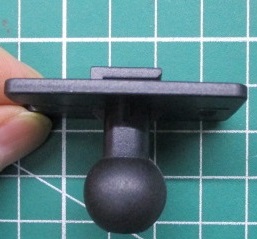
Vertical mount head |
To use the Combo mount as a Vertical mount, remove the locking ring from the mount base by turning counter-clockwise. Once the ring is separated from the base, the Horizontal mount head assembly and ring is pulled from the base. Place the ring around the Vertical head ball and snap the vertical head assembly into the base. Tighten the ring.
Vertical Surface Mount (Included in Combo mount)
 |
 |
 |
 |
 |
 |
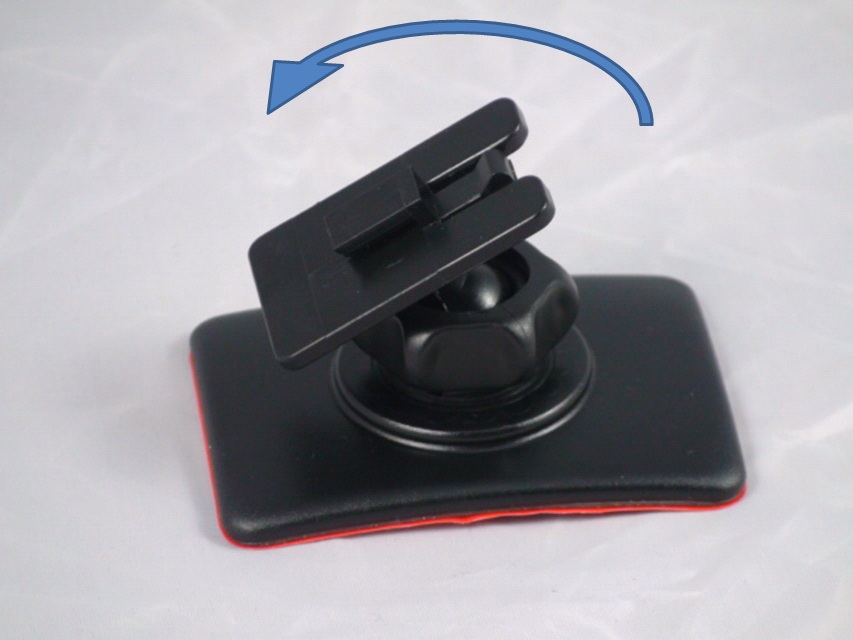
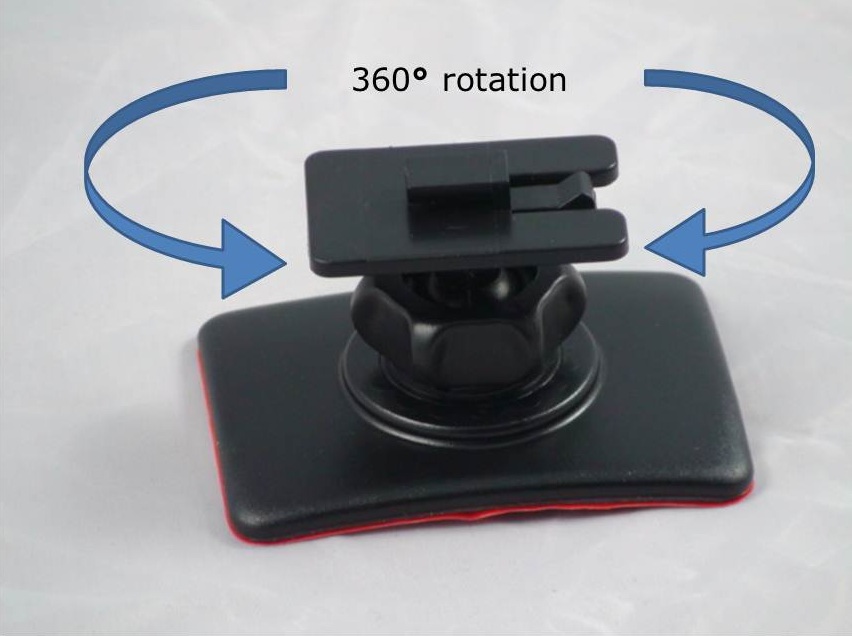
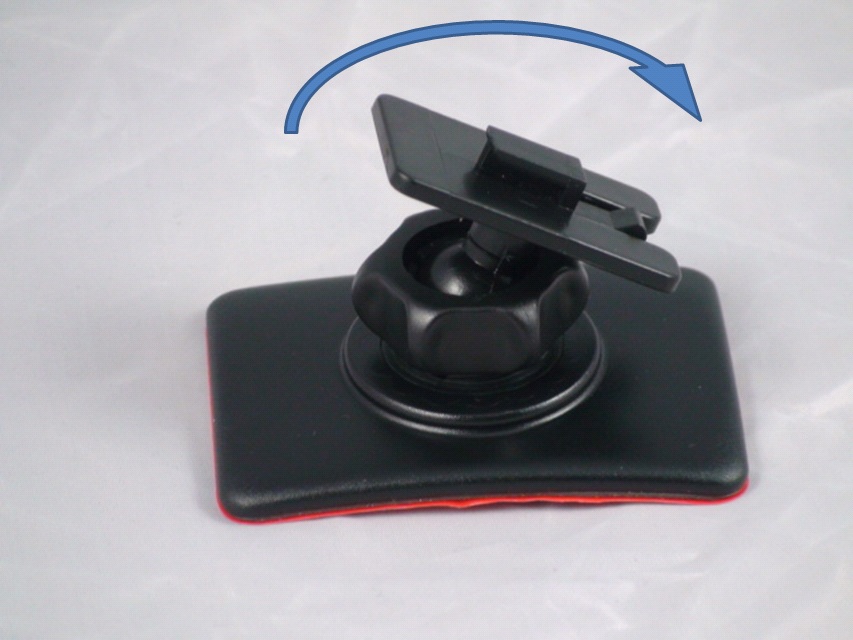
The vertical mount is designed to adhere to vertical surfaces on the dash face. The mounting head features 360 degree rotation and can be swiveled up/down and left & right, thanks to the ball and socket design. The mounting bracket, included with UltraGauge, fits into the "T" notch located on the face of the swivel assembly. The mount base is flexible allowing it to take the shape of curved surfaces, as shown above. The base can also be trimmed in size with a scissors to aid in custom installations. The mount features a very high quality 3M™ adhesive
Unlike the Windshield mount, the vertical surface mount has the potential to mount UltraGauge so that it can not easily be seen from outside the vehicle.
| Base dimensions | 2.0" x 2.8" |
| Base to Mount face | 1.44" |
| Head rotation | 360° |
| Head swivel | +-25° |
| Warranty | 6 months** |
Installation Instructions:
- The surface to which the fastener is attached must be clean, dry, and oil and grease free. Clean the surface, even if it appears clean.
- Apply only after the surface and the adhesive have reached a temperature range of 70F to 90F.
- Avoid leaving the adhesive exposed for longer than 3 minutes after removing the protective backing.
- The adhesive is pressure sensitive. Apply roughly 5lbs of force per square inch for 5 seconds. Work the surface to ensure all areas of the adhesive are activated.
- After application, and for maximum adhesion, allow the adhesive to set for 1 hour before use.
- When attaching the UltraGauge mounting bracket to the Vertical mount head, it is not necessary to fully seat the bracket. Slide the bracket onto the "T" notch until the bracket will no longer slide easily. Do not force the bracket
- Once the bracket is in place, UltraGauge can be snapped into the bracket.
Once removed from its protective bag, the vertical mount can not be returned for a refund. Because the adhesive performance is customer installation dependent, the adhesive has no warranty.
The adhesive can only be used once. If the above instructions were not followed and the adhesive has failed, the adhesive is end of life. The adhesive is a high quality 3M™ adhesive and the only known reason for failure, is failure to follow the above instructions. Some have reported that after they failed to follow the above instructions they had some luck following the "Failed Installation" instructions associated with the windshield mount below.
If the mount has been removed and it is desired to reuse the mount, the now consumed adhesive can be supplemented with Plumbers Goop. Apply 4 small 1/4" round dabs of Plumbers Goop to the four corners of the mount and then apply to the surface. Plumbers Goop will become brittle if exposed to sun light. Make sure the Goop does not squeeze out the sides of the mount. A little plumbers goop has a lot of holding force. Only a small dab is necessary.
The Combo Surface Mount may optionally be purchased separately
** The mount has a 6 month warranty excluding the adhesive. Many customers install the mount without reading the installation instructions and in so doing impair the adhesives performance. Also, the adhesive should not be exposed to prolonged high temperatures, such as is common when a vehicle is parked in the sun with the windows up and no form of shading. The adhesive will eventually fail under such conditions.
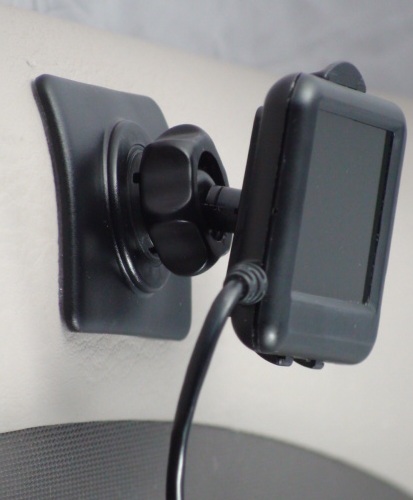
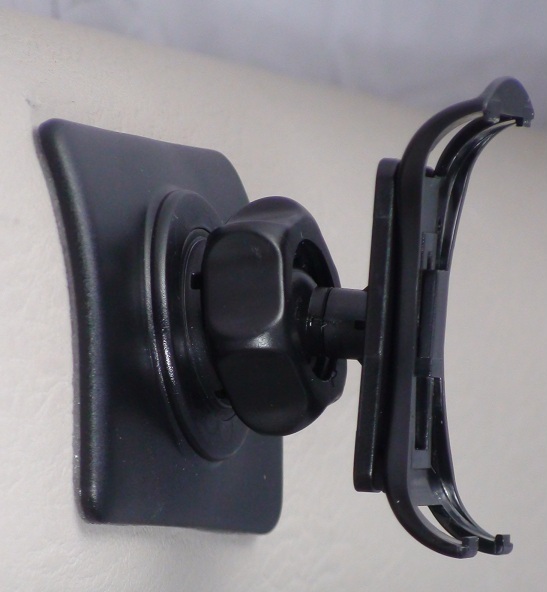
Horizontal Surface Mount (Included in Combo mount)
 |
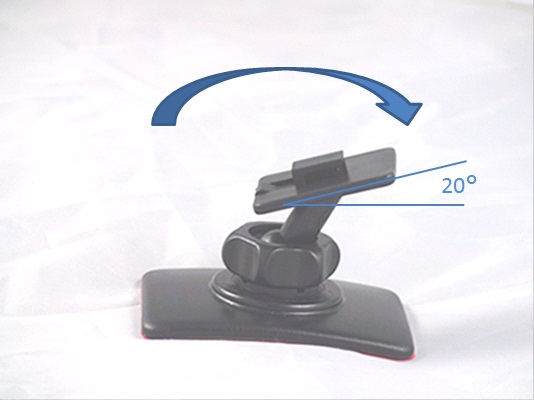 |
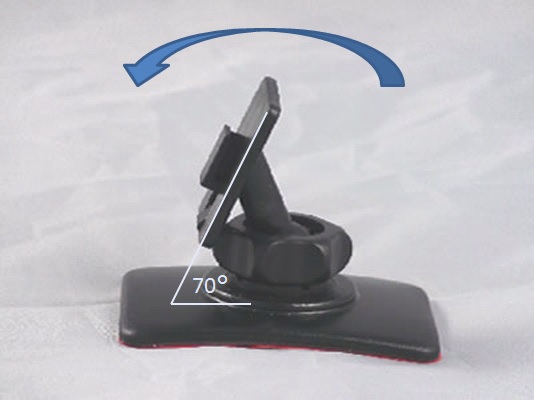
The Horizontal Surface Mount is identical to the Vertical Surface mount above, except this mount is ideal for mounting Ultragauge on a horizontal surface, such as a steering column, console or dash*.
| Base dimensions | 2.0" x 2.8" |
| Base to highest point on head, when rotated to 70 degrees | 2.12" |
| Head rotation | 360° |
| Head swivel | 50° |
| Warranty | 6 months** |
NOTE: The UltraGauge Bracket is not designed to fully slide on the the "T" slot of the mount. Only slide the bracket on to the "T" enough to hold it securely in place. Attempting to fully insert the Bracket onto the "T" slot will result in damage to the bracket.
Once removed from its protective bag, the horizontal mount can not be returned for a refund. Because the adhesive performance is customer installation dependent, the adhesive has no warranty.
Please see the vertical surface mount above for installation details
The Combo Surface Mount may be optionally purchased separately
* While the Horizontal mount can be used on the dash, this is discouraged since Dash temperatures can exceed the maximum temperature of UltraGauge and damage the display. This can be resolved with the use of a Windshield Sun Shade. With the use of a Sun Shade the Horizontal mount provides an excellent dash mount solution. Be sure to follow the installation instructions above.
** The mount has a 6 month warranty excluding the adhesive. Many customers install the mount without reading the installation instructions and in so doing impair the adhesives performance. Also, the adhesive should not be exposed to prolonged high temperatures, such as is common when a vehicle is parked in the sun with the windows up and no form of shading. The adhesive will eventually fail under such conditions.
Windshield Mount
 |
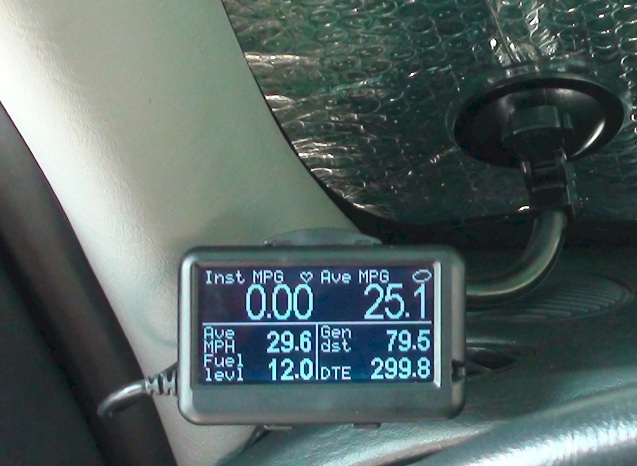 |
The Windshield mount attaches directly to the inside surface of the windshield. The long neck of the windshield mount is flexible and can be formed to fit most applications(see the picture above and to the right). The windshield mount head, which attaches to the UltraGauge bracket, is a ball design which allows for fine position adjustment. The ball can be locked in place with the included locking ring.
| Overall Length | 8.3" (21.1cm) |
| Suction Cub diameter | 2.75" (7cm) |
| Head rotation | 360° |
| Head swivel | 80° |
| Material | Polycarbonate |
| Neck | Flexible |
| Warranty | 6 months* |
Installation Instructions:
- The windshield must be completely clean, dry and smooth. If the surface is not prepared properly the suction cup seal will eventually fail. Smoking will leave a film on all vehicle surfaces and will prevent the mount from attaching.
- The suction cup is protected by a thin plastic sheet which must first be removed.
- The silicon suction cup becomes less flexible with cold temperatures. If installing when the ambient temperature is <65 °F, it will be necessary to warm the suction cup prior to installation. A hair drier can be used.
- The silicon suction cup must be pressed firmly against the windshield. It may be necessary to first mold the neck of the mount in order to allow the cup to sit flat against the glass.
- When molding the neck of the windshield mount use two hands and grasp the neck only. Never attempt to adjust the neck by grasping the bracket or UltraGauge....damage will occur
- Once the suction cup is firmly against the glass and flat against the glass, press the locking tab to create the suction which will adhere the suction cup to the glass.
- Attach the bracket to the mount. Do not attempt to force the bracket completely on to the mount, only slide the bracket onto the mount until it will not slide more.
- Adjust the mount's swivel head as desired and then very lightly tighten the locking ring.
- Insert UltraGauge into the bracket.
It is generally best to only lightly tighten the locking ring, so as to allow the ball swivel to still operate and hold its position. Attempting to position UltraGauge while the locking ring is tight, can result in damage to the mounting bracket.
* A suction based mount like the windshield mount is not a "forever" mount. It is necessary to inspect the condition of the mount every so often and increasingly with age. It is recommended to re-install the mount, as per the "Failed Installation" instruction below, at the start of winter and the start of summer, as a minimum and more often with age. Failure to do so, may result in the failure of the mount, and potential damage to UltraGauge.
Failed Installation
If the mount was installed without following the instructions above, the suction cup will likely have been contaminated by the dirty windshield.
If so, it will be necessary to wash the suction cup in warm water with a little dish soap. Rinse with hot water. Shake dry and then air dry until completely dry. Do not attempt to dry the suction cup with a towel or paper towel. Both will leave fibrous debris on the cup which will cause the suction cup to fail. A hair dryer can be used to accelerate the drying. Once the suction cup is dry, then follow the installation instructions above.
If the mount has been removed from it's protective plastic bag , it can no longer be returned as part of our 30-day satisfaction guarantee.
The Windshield Mount may be optionally purchased separately
Compact Windshield Mount
 |
 |
The compact Windshield mount is fully articulated. The head can be rotated 360° and can swivel 180°. This windshield mount is well suited for applications where space is at a premium or the windshield is more vertical (less sloped). The larger suction cup provides greater holding strength.
| Overall Length | 4.0" (10.1cm) |
| Suction Cub diameter | 3.25" (8.3cm) |
| Head rotation | 360° |
| Head swivel | 180° |
| Material | Polycarbonate |
| Warranty | 6 months* |
See windshield mount installation instructions above.
WINDSHIELD MOUNT SIZE COMPARISON
